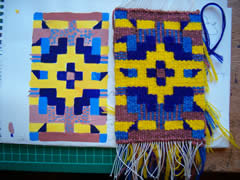
 These small tapestries are really fun to design and weave. They make ‘flowers in your brain’. I’ve designed this one in a slit weave and the only ‘rules’ are to make sure that the vertical slits are not too long, but if they are you can stitch them up after weaving.
This one is based on a 9 x 15 grid of 1cm squares. Each of the squares can be one colour or a combination of colours. Because the size of the tapestry is quite small, (10x15cms) I used a warp set of 11 epi (or 16 ends to 4 cms) with a 12/6 seine twine.
I used 4 strands of 2 ply Victorian Tapestry Wool in 4 colours. I usually tell students to use a deep dark (like navy, black, brown etc), a light bright (white or yellow)and the other colours as midtones. This simple colour formula works well for this type of weaving design.
For design ideas Navajo rugs are a great inspiration. Although any kilim design uses this slit weave technique.
I like to paint my designs on a grid using gouache paints that are mixed to match the yarn colours I’m going to use. This way the finished tapestry will be quite close in appearance to the intended design and works with the yarn you have on hand.
I’ve used this block weaving idea for students very successfully. Blocks and variations can be a very rich design source.
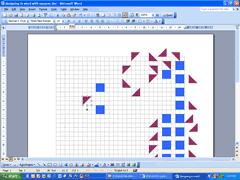
 I’ve also used MS Word to make the grid. I usually give the students a word document (you can download here) with little 1cm squares and triangles already on it. The students then have to display the grid on screen. This dialog box is accessed by the Drawing toolbar, then select Display gridlines on screen and make sure the grid is 1cm x 1cm). The design squares can then be moved around and colours changed as you please.
The best print sources IMHO are Kilim and Woven Structures

Leave a Reply